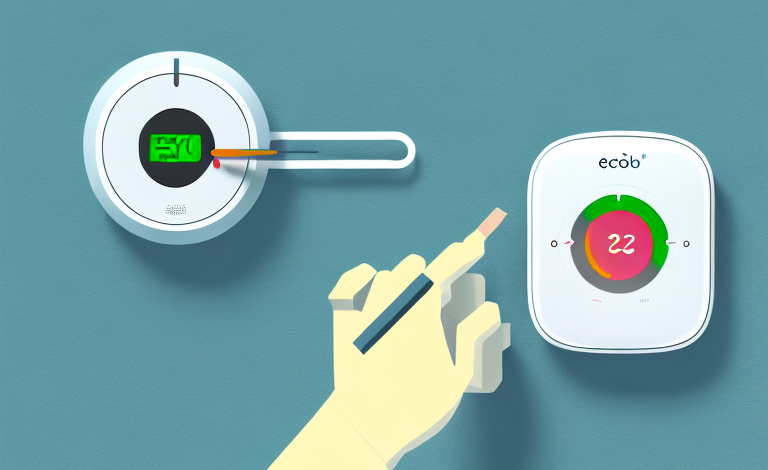
If you are considering installing an ecobee thermostat in your home, you might be wondering whether the process is simple enough for a layperson to handle. The good news is that ecobee thermostats are designed to be easy to install, even for those without professional experience in electrical work or HVAC systems. Here is everything you need to know about installing an ecobee thermostat.
The benefits of installing an ecobee thermostat
Before we delve into the specifics of ecobee thermostat installation, it’s worth taking a moment to consider why so many homeowners are making the switch to smart thermostats like ecobee. These innovative devices offer a range of benefits, including:
- Automated energy savings: ecobee thermostats learn your household’s heating and cooling needs and adjust accordingly, helping you save money on your energy bill while reducing your carbon footprint
- Remote control: with ecobee, you can monitor and adjust your thermostat from anywhere via a smartphone app, ensuring that your home is always at the right temperature
- Voice control: ecobee thermostats integrate with popular virtual assistants like Amazon Alexa, allowing you to change the temperature with voice commands
- Smart sensors: ecobee’s sensors can detect which rooms of your home are occupied and adjust the temperature accordingly, ensuring that everyone is comfortable
In addition to these benefits, ecobee thermostats also offer a range of features that make them a great choice for homeowners. For example, ecobee thermostats come with a built-in touchscreen display that allows you to easily adjust the temperature and view energy usage data. They also offer detailed energy reports that provide insights into your energy usage patterns, helping you identify areas where you can make further energy-saving improvements. Additionally, ecobee thermostats are compatible with a wide range of HVAC systems, making them a versatile choice for any home.
ecobee thermostat installation requirements
Before you begin the installation process, there are a few things you’ll need to have in place:
- A reliable Wi-Fi network
- A compatible heating and cooling system
- A compatible smartphone or tablet for controlling your thermostat
- The ability to access your HVAC system’s wiring
Additionally, it is important to ensure that your HVAC system is turned off before beginning the installation process. This will prevent any potential electrical hazards and ensure a safe installation. It is also recommended to have a basic understanding of your HVAC system’s wiring and to consult the installation manual provided by ecobee for specific instructions.
Tools and materials needed for ecobee thermostat installation
Here are the tools and materials you’ll need to have on hand:
- Screwdriver
- Drill (optional)
- Level
- Wire strippers
- Electrical tape
- ecobee thermostat
- Mounting plate (included with thermostat)
- Screws (included with thermostat)
It’s important to note that before beginning the installation process, you should turn off the power to your HVAC system. This can typically be done by turning off the circuit breaker that controls your heating and cooling system. Additionally, if you’re not comfortable working with electrical wiring, it’s recommended that you hire a professional to install the ecobee thermostat for you.
How to prepare for ecobee thermostat installation
Before you begin the installation process, you’ll need to turn off the power to your HVAC system to avoid any potential electrical hazards. Locate your HVAC system’s circuit breaker and turn it off to cut power to the system. It’s also a good idea to read through the ecobee installation manual to get a sense of what you’ll be doing step-by-step.
Additionally, you should gather all the necessary tools and equipment before starting the installation process. This may include a screwdriver, wire stripper, level, and drill. It’s also important to ensure that you have the correct wiring for your ecobee thermostat, as different HVAC systems may require different wiring configurations. If you’re unsure about the wiring, consult a professional electrician or HVAC technician to avoid any potential damage to your system.
Step-by-step guide to install an ecobee thermostat
Now that you’re prepared, it’s time to get started with the installation process:
- Remove the old thermostat from the wall and take note of how the wires were connected. Make a note of which wire was connected to which terminal or take a photo for reference.
- Place the mounting plate that came with the ecobee thermostat on the wall and use the screws included with the thermostat to attach it to the wall.
- Connect the wires from your HVAC system to the ecobee thermostat following the instructions in the manual. Use wire strippers to expose the wire ends and electrical tape to secure them. Make sure the wires are attached to the correct terminals on the ecobee thermostat.
- Attach the ecobee thermostat to the mounting plate and ensure that it is level using a level.
- Turn the power back on to your HVAC system and follow the instructions on the ecobee thermostat screen to connect it to your Wi-Fi network and set up your preferences.
It’s important to note that before beginning the installation process, you should turn off the power to your HVAC system to avoid any electrical hazards. You can do this by turning off the circuit breaker or removing the fuse that controls the HVAC system. Additionally, if you’re not comfortable working with electrical wiring, it’s recommended that you hire a professional to install the ecobee thermostat for you.
Common mistakes to avoid during ecobee thermostat installation
While installing an ecobee thermostat is a relatively straightforward process, there are a few common mistakes that can trip up even experienced DIYers:
- Incorrectly connecting wires: Take the time to carefully label the wires when you remove your old thermostat and double-check that you’re attaching them to the correct terminals on the ecobee thermostat.
- Not turning off the power: It is essential to turn off the power to your HVAC system before you begin removing the old thermostat and connecting the new one. Failure to do so could result in an electrical shock or damage to your HVAC system.
- Not using the mounting plate: Don’t try to attach the ecobee thermostat directly to the wall without using the mounting plate that comes with it. Attaching the device incorrectly can result in it becoming loose or falling off the wall.
Another common mistake to avoid during ecobee thermostat installation is not properly configuring the settings. Once you have installed the thermostat, take the time to go through the settings and ensure that they are set up correctly for your home and HVAC system. This includes setting the correct temperature differentials, configuring the fan settings, and setting up any desired schedules or preferences. Failure to properly configure the settings can result in inefficient heating and cooling, as well as increased energy costs.
Troubleshooting tips for installing an ecobee thermostat
If you encounter any issues during the installation process, consult the ecobee installation manual or contact customer support for assistance. If the thermostat seems to be working but is not communicating with your HVAC system, double-check that the wires are connected properly and that the power is turned on.
Another common issue that may arise during installation is difficulty connecting the thermostat to your Wi-Fi network. In this case, ensure that your Wi-Fi network is compatible with the ecobee thermostat and that you have entered the correct network name and password. If you continue to experience issues, try resetting the thermostat and attempting to connect again.
DIY vs professional installation of an ecobee thermostat: Which is best?
If you feel comfortable working with electrical systems and have the tools required for installation, then installing an ecobee thermostat yourself is a great way to save money on professional installation fees. However, if you’re unsure about any aspect of the installation process, it’s best to seek the help of a professional HVAC technician or electrician to ensure that the installation is done correctly and safely.
It’s important to note that some ecobee thermostats may require additional wiring or modifications to your HVAC system, which can be difficult for a DIY installation. Additionally, professional installation often comes with a warranty or guarantee, providing peace of mind in case any issues arise with the installation or the thermostat itself. Ultimately, the decision between DIY and professional installation depends on your level of comfort and experience with electrical systems, as well as the specific requirements of your ecobee thermostat and HVAC system.
How long does it take to install an ecobee thermostat?
The time required to install an ecobee thermostat will depend on your level of experience with electrical work and the complexity of your HVAC system. For most homeowners, installation should take between 30 minutes and two hours from start to finish.
It is important to note that if you are not comfortable working with electrical wiring, it is recommended that you hire a licensed electrician to install the thermostat for you. This will ensure that the installation is done safely and correctly. Additionally, if your HVAC system is older or more complex, it may require additional time and expertise to properly install the ecobee thermostat.
Cost comparison of installing an ecobee thermostat vs traditional thermostats
While ecobee thermostats are more expensive than traditional, non-smart thermostats, they can save you money over time by reducing your home’s energy consumption. Additionally, because ecobee thermostats often include features like voice control and remote monitoring, they can be more convenient to use than traditional thermostats. When considering the cost of installing an ecobee thermostat, it’s important to factor in long-term savings on your energy bills.
Another advantage of ecobee thermostats is their ability to learn your household’s heating and cooling patterns, and adjust accordingly. This means that over time, the thermostat will automatically adjust to your preferred temperature settings, without you having to manually adjust it. This can lead to even greater energy savings and convenience.
It’s also worth noting that many utility companies offer rebates or incentives for installing ecobee thermostats, which can help offset the initial cost. Additionally, some ecobee models are compatible with smart home systems, allowing you to integrate your thermostat with other devices in your home for even greater control and automation.
Factors to consider when deciding whether to install an ecobee thermostat
Ultimately, the decision of whether or not to install an ecobee thermostat will depend on your budget, your level of comfort with DIY installation, and your home’s heating and cooling needs. For homeowners who want to save money on their energy bills and enjoy the convenience of a smart thermostat, ecobee is a great choice. With careful planning and attention to detail, installing an ecobee thermostat can be a simple and rewarding project.
One additional factor to consider when deciding whether to install an ecobee thermostat is the compatibility with your home’s HVAC system. Ecobee thermostats are compatible with most heating and cooling systems, but it’s important to check the compatibility before making a purchase. Some older systems may require additional wiring or adapters to work with an ecobee thermostat, which could add to the installation cost. It’s also important to note that ecobee thermostats work best with homes that have a consistent schedule, as the thermostat learns your routine and adjusts accordingly. If your schedule is unpredictable or frequently changes, a different type of thermostat may be a better fit for your home.