Yes, absolutely! Cleaning your Vitamix blender is an important part of maintaining its longevity and performance quality. Over time, residue and buildup can accumulate on the blades and around the edges of your blender, impacting the quality of your blends and potentially leading to mechanical issues. Fortunately, disassembling your Vitamix blender for cleaning is a straightforward and easy process, one that will leave your machine looking and working like new.
How to safely disassemble your Vitamix for cleaning
Before diving in, it’s worth noting that safety is a top priority when disassembling any appliance, including a Vitamix blender. Be sure to turn off and unplug your blender before removing any parts, and take care when handling the sharp blades. Once you’re ready to get started, begin by removing the blender jar from the motor base. Depending on your model, this may require a gentle twist or quick pull to detach the jar from the base.
After removing the blender jar, disassemble the remaining parts carefully. Remove the lid, the tamper, and the rubber gasket from the jar. Wash each part separately with warm soapy water and rinse thoroughly. Be sure to clean the blades carefully, as they are sharp and can cause injury. You can use a brush to remove any stubborn residue from the blades. Once all the parts are clean, dry them thoroughly before reassembling the blender.
The importance of cleaning your Vitamix regularly
Cleaning your Vitamix blender regularly is critical for a few reasons. First, regular cleaning helps to ensure that oils and residue from food don’t build up on the blender’s blades, which can cause the blender to work less effectively over time. Additionally, a clean blender jar and base will help prevent cross-contamination between different blends, ensuring that you always have a sanitary and safe appliance to work with.
Another reason why it’s important to clean your Vitamix regularly is to prevent the growth of bacteria and mold. If you leave food particles or liquid in the blender for too long, it can create a breeding ground for harmful microorganisms. This can not only affect the taste and quality of your blends but can also pose a health risk.
Lastly, regular cleaning can help extend the lifespan of your Vitamix blender. By keeping it clean and well-maintained, you can prevent damage to the motor and other components, which can save you money in the long run. It’s recommended to clean your Vitamix after every use, or at least once a day if you use it frequently.
Understanding the different parts of your Vitamix blender
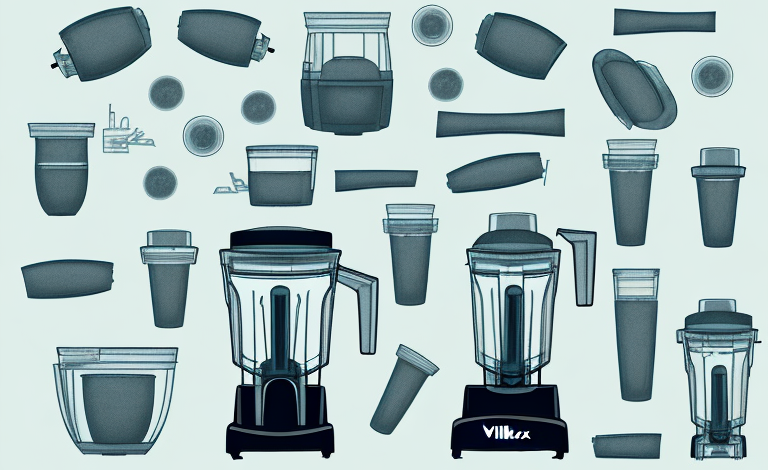
Before you can successfully disassemble and clean your Vitamix blender, it’s essential to understand the different parts of the machine. The primary components of a Vitamix blender include the motor base (which houses the blender’s motor and controls), the blender jar (which holds your ingredients and attaches to the motor base), and the blade assembly (which sits inside the blender jar and is responsible for blending your ingredients).
In addition to these primary components, some Vitamix blenders also come with additional accessories such as tamper tools, which can be used to push down ingredients that may get stuck during blending. It’s important to note that not all Vitamix blenders come with the same accessories, so it’s important to check the product specifications before purchasing. Additionally, some Vitamix blenders may have different blade assemblies, such as a dry blade assembly for grinding grains or a low-profile blade assembly for easier storage. Understanding the different parts and accessories of your Vitamix blender can help you get the most out of your machine and create a wider variety of recipes.
Step-by-step guide to taking apart your Vitamix for cleaning
To disassemble your Vitamix blender for cleaning, follow these simple steps:
- Turn off and unplug your blender.
- Remove the blender jar from the motor base.
- Carefully unscrew the lid from the blender jar.
- Gently lift the blade assembly out of the jar.
- Disassemble the blade assembly by twisting off any separate components (such as the blade housing).
- Clean all parts of your Vitamix blender thoroughly before reassembling.
What cleaning agents are safe to use on your Vitamix?
When cleaning your Vitamix blender, it’s important to use only safe cleaning agents that won’t damage the machine or leave behind harmful residues. For best results, stick to mild dish soap and warm water when cleaning the blender jar, lid, and blade assembly. Avoid using harsh chemicals, abrasive cleaning tools (such as steel wool), or putting any parts of the blender in the dishwasher, as this can cause damage to the appliance.
It’s also important to note that you should never submerge the entire blender base in water or any other liquid. Instead, use a damp cloth to wipe down the base and control panel. Additionally, if you notice any stubborn stains or buildup on the blender jar, you can try using a mixture of baking soda and water to gently scrub the area. Just be sure to rinse thoroughly with warm water afterwards.
Tips for cleaning hard-to-reach areas of your Vitamix blender
Certain areas of your Vitamix blender can be tricky to clean, particularly around the blades or in tight corners of the blender jar. A few tips for cleaning these hard-to-reach areas include:
- Using a small, soft-bristled brush (such as a toothbrush) to scrub around the blades.
- Using a long-handled sponge or brush to reach into corners of the blender jar.
- Soaking parts of the blender in warm water or a mild cleaning solution to help loosen any buildup or grime.
Another helpful tip is to use a mixture of baking soda and water to clean stubborn stains or odors in your Vitamix blender. Simply mix a tablespoon of baking soda with a cup of water and blend on high for a few minutes. Then, rinse out the blender with warm water and dish soap to remove any remaining residue.
How often should you deep clean your Vitamix?
To keep your Vitamix blender in top working order, it’s recommended that you perform routine cleaning after each use. However, it’s also a good idea to perform a deep clean (where you disassemble and clean all parts of the blender thoroughly) every few months, depending on how often you use the appliance. By performing a deep clean regularly, you can ensure that your Vitamix blender stays in top shape for years to come.
When performing a deep clean of your Vitamix blender, it’s important to use the right cleaning materials. Avoid using abrasive sponges or harsh chemicals, as these can damage the blender’s components. Instead, use a soft sponge or cloth and a mild dish soap to clean the parts thoroughly.
If you notice any buildup or discoloration on your Vitamix blender, it may be time for a deep clean. This can be caused by a variety of factors, including hard water or using the blender to blend tough ingredients like nuts or seeds. By keeping an eye on the condition of your blender and performing regular deep cleans, you can ensure that it continues to function at its best.
Maintenance tips to keep your Vitamix in top shape
Regular cleaning is just one part of maintaining your Vitamix blender. A few other maintenance tips to keep in mind include:
- Avoid overfilling the blender jar beyond the maximum fill line.
- Store your blender in a cool, dry place when not in use.
- Regularly check for signs of wear and tear, such as cracks or damage to the blade assembly.
Another important maintenance tip is to always use the appropriate speed setting for the ingredients you are blending. Using too high of a speed for certain ingredients can cause unnecessary wear and tear on the blender’s motor and blades.
Additionally, it is recommended to replace the blender’s blade assembly every 3-5 years, depending on usage. This will ensure optimal blending performance and prevent any potential safety hazards from worn out blades.
Troubleshooting common issues with cleaning and maintaining your Vitamix
If you’re experiencing issues with cleaning or maintaining your Vitamix blender, there are a few common solutions to consider. For example, if you’re having trouble removing buildup from the blade assembly, soaking the component in a mixture of warm water and vinegar can help to dissolve grime. Meanwhile, if you’re noticing wear and tear on your blender over time, it may be time to replace certain components (such as the blade assembly) to ensure your blender continues to work effectively.
The benefits of a clean and well-maintained Vitamix blender
By keeping your Vitamix blender clean and properly maintained, you can reap a variety of benefits, including:
- A more efficient blending process.
- Better-tasting blends, thanks to a cleaner blender jar and blades.
- A longer lifespan for your Vitamix blender.
- Increased safety during blending, without the risk of cross-contamination or mechanical issues.
Avoiding damage while disassembling and cleaning your Vitamix
While disassembling and cleaning your Vitamix blender is a relatively straightforward process, it’s still important to take care to avoid any damage to the machine. Be sure to follow the manufacturer’s instructions before attempting to remove any parts of the blender, and only use safe cleaning agents and tools when scrubbing the appliance. By taking care to clean and maintain your Vitamix blender properly, you can enjoy years of flawless blending performance.
Comparing the best cleaning methods for a Vitamix blender
There are several different cleaning methods you can use to clean your Vitamix blender, depending on your specific preferences and needs. Some popular cleaning methods include:
- Cleaning the blender jar and blades by hand with mild dish soap and warm water.
- Soaking parts of the blender in a mild cleaning agent to help loosen buildup and grime.
- Using a specialized blender cleaning agent (such as Vitamix Blender Cleaner) to dissolve tough residues and stains.
Experiment with these different cleaning methods to find the one that works best for you and your blending routine.
Frequently asked questions about cleaning a Vitamix blender
If you still have questions about cleaning and maintaining your Vitamix blender, you’re certainly not alone. Here are a few common questions that users often have about this important aspect of Blender care:
- Q: Can I put my Vitamix blender in the dishwasher?
- A: It is not recommended that you put any parts of the blender in the dishwasher, as this can cause damage to the appliance.
- Q: What is the best way to clean the blades on a Vitamix blender?
- A: Use a soft-bristled brush, such as a toothbrush, to carefully scrub around the blades to remove any residue or buildup.
- Q: How often should I deep clean my Vitamix blender?
- A: It’s recommended that you deep clean your Vitamix blender every few months, depending on how often you use the appliance.
By following these cleaning tips and best practices, you can ensure that your Vitamix blender stays in top working order for years to come. Happy blending!